PayPal payment settings in WP Invoice plugin
Here are the settings for the PayPal Settings area. It will cover how to set up PayPal payments with WP-Invoice. To enable payments with PayPal and be able to view this area, the PayPal checkbox under Payment Gateways must be checked.
- PayPal Username: Enter the email address you use as a username with your PayPal account
- Use In Test Mode: Select “Yes” if you want to do some test payments before you enable live payments. Select “No” if you want to enable real payments or when you are done testing. ATTENTION: Do not forget to change this setting after you are done testing or you will not be credited any money for invoice payments!
- PayPal IPN URL: This URL is created automatically by WP-Invoice. If you have enabled IPN (Instant Payment Notifications) on your PayPal account, as soon as a transaction is completed, PayPal sends a POST request to your WordPress installation (this URL). If you wish to use IPN, you should update your PayPal IPN settings so that it sends notifications to this URL.

Enabling IPN in PayPal
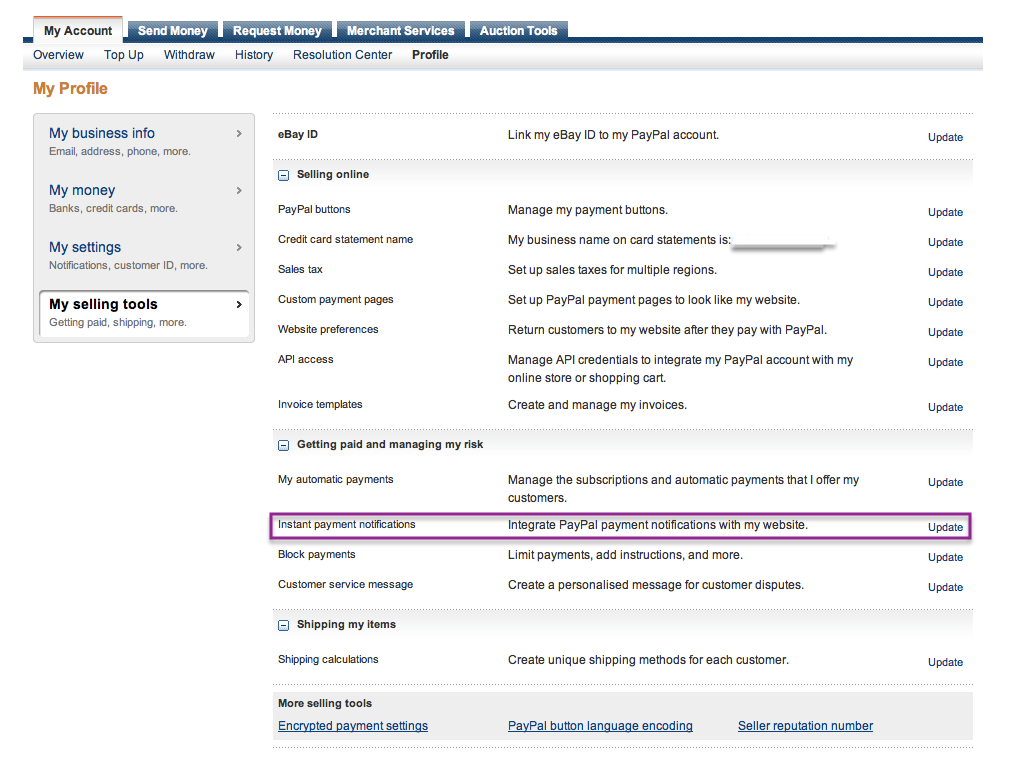
Setting your PayPal IPN (Instant Payment Notifications) settings correctly is a very important part of setting up your account, because without doing so, your invoices will not be marked as paid after your client has paid you with PayPal. To enable IPN, log in to PayPal and go to My profile - My Selling Tools - Instant Payment notifications and click “update”.
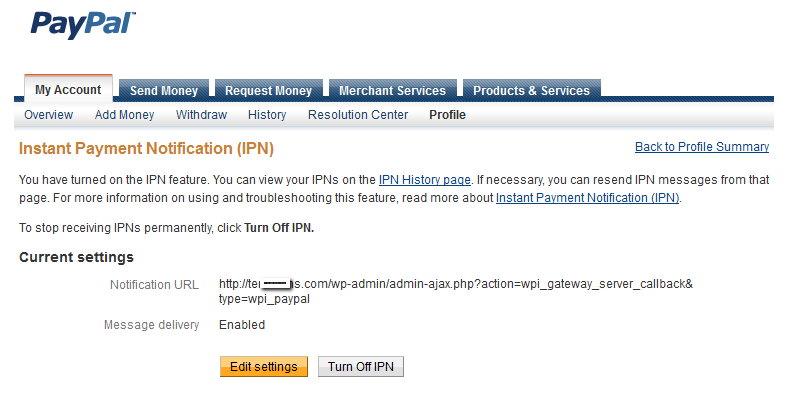
In this new screen, edit the settings, set the URL provided from WP-Invoice, under PayPal settings and save. You have just enabled Instant Payment Notifications that will mark your invoices as paid automatically after your client completes the transaction.
For more information on IPN, visit the PayPal Instant Payment Notification(IPN) Help Page and the Testing Instant Payment Notification(IPN) PayPal Help Page .

